


rhino89523
-
Posts
208 -
Joined
-
Last visited
-
Days Won
34
Content Type
Shop Talk
Gallery
Marketplace
Downloads
Articles
Completed Projects Database
Blogs
Events
Profiles
Everything posted by rhino89523
-

2001 Tige 23V Total Rebuild
rhino89523 commented on SONICJK's project in Interior Updates & Refinish Projects
In the words of the late Guru of Gang Starr......Skills. Dam thats some series work and the results are sick. I like your second steering wheel. -
Gel Coat Bubble/Scratch/defect repair
rhino89523 commented on SONICJK's project in Quick Fix / Small Projects
I had to do a similar repair to my wifes jeep when I backed it into the garage door...yeah I'm an idiot. Hardest part on the jeep was matching the stipple finish they use on the new tops after making the fiberglass repair. -
Great video quality, I like the time spent messing with angles and placement...very scientific. Want to know what that song is as well.
-
Man that looks nice!!! You make me feel lucky, my boat had snap in carpet.
-
Centurion Avalanche Floor Update
rhino89523 commented on rhino89523's project in Flooring Upgrade Projects
Figured I would update this a little. I ended up pulling all of this out and prepping the floor at the end of last summer. I waited a bit and ended up going with Gatorstep in similar colors. Sort of anticlimactic as it looks almost the same as before but better. Since gatorstep starts off with a blank slate and CNC,s the whole thing it has cleaner nicer lines. Gatorstep cuts on a 45 instead of 90 and I like that a lot too. The Chinese stuff was soooo slick I was originally going to go with the molded stuff that has a bunch of little dimples and got talked out of it by Gatorstep's rep named Mason Obray. The Gatorstep isn't slick at all and it stays cleaner and cleans up easier than the knock off stuff did. I have no signs of any delam and we are almost done with a full year, by this point last year I was missing full strips and it looked like crap. I definitely recommend spending the extra dollars on Gatorstep..... I don't know about seadeck but I am sure it would be quality as well. The process for Gatorstep is simple. If they have your boat as a template you have them send you the templates, they charge you like $50 but it is applied to your order if you go with their flooring. You make sure it fits the way you want and if you like it cool. In my case it needed some small adjustments. I made the adjustments and sent back the templates. They sent me back a new set of templates with the changes....at this point I was happy so they sent over the "artwork" which is just how the design will look on each sheet. I gave the O.K. sent my money and a week later it showed up. It really isn't a project to install, you pull off the backing and stick it, it fits perfect, Gatorstep has some deal with the adhesive where you can pull it and restick it....I did that in a few spots and it worked out cool, I like that feature. I am super happy with my flooring, I don't slip on it and it looks sweet, it stays cool and clean and I have a 100% satisfaction rating. -
Centurion Avalanche Floor Update
rhino89523 commented on rhino89523's project in Flooring Upgrade Projects
Think I have made up my mind...of course it's going to cost me more and be way less of a DIY project. I think I am going with the molded Gatorstep. I can still have my spongy feel, I can still have the grey I liked, I can still have sort of the teak look with the 2 tone greay and black but the top sheet has all these little dimpled bubbles that I think will keep old clumsy from slamming the deck again. I'm getting too old to be taking diggers for no reason, If I'm going to take a slam I want it to be worth it, not stepping through with a tube in my hands....Lame!!! -
Centurion Avalanche Floor Update
rhino89523 commented on rhino89523's project in Flooring Upgrade Projects
Yeah when I was talking with them I was hoping they would replace a few sheets for free...that wasn't offered so I'm pretty much thinking different brand. I am just not feeling the look of the dimpled stuff the way I love the look of this faux teak...but I am a function over fashion kind of guy. -
Centurion Avalanche Floor Update
rhino89523 commented on rhino89523's project in Flooring Upgrade Projects
In my above post, where I was asking if anyone has dealt with the adhesive between the EVA and the floor I was talking about removing this stuff. The connection between the material and the floor is so solid I picture it coming up in little foam pieces and being a royal pain, then trying to get the glue off after removing the EVA being a pain as well. I kind of see that being the "nobody wants to talk about it but gasoline takes it off the best" sort of deal that you then have to with some other product to get the gas residue before trying to stick down whatever you are putting on there next.....all of the removal I think might take as long as the install so when I add that to the time of this whole project....you get the idea. -
Centurion Avalanche Floor Update
rhino89523 commented on rhino89523's project in Flooring Upgrade Projects
The adhesive isn't an issue on the floor prep part of it, the stuff stuck down to the floor awesome. My issue is between the black base EVA and the grey upper layer EVA it has separated at corners and in some instances the whole strip. I have two rows that I just pulled that are now just black runs. I feel this is full on the Chinese knock off issue. The company has been pretty cool about it, assured me they have updated there laminating process and offered me a discount on a reorder. They also have a new product that the router is set at a 45 so the edges might be less likely to lift. All that said I am having trouble going back to this brand. The material was a substantial discount over other brands for sure, but the time involved in the install was really the cost. I busted this out basically in one long work day (like sun up to late night), but I have so many projects and so many different toys I try to keep running that I need a one day project like this to last longer and I am willing to double the materials cost to achieve this if that's what it takes. My boat also has the cooler in the windshield walkthrough so whatever material I use I think I would like it to glue down. I think I am pretty well set on running some sort of EVA again, but I am leaning towards something with some bumps. -
Centurion Avalanche Floor Update
rhino89523 commented on rhino89523's project in Flooring Upgrade Projects
So I have to come back to this project....Yeah it's time for a redo Things I like about this product: The look when completed Things I didn't like: It de- laminated between the 2 sheets really soon after install and I was having to glue it back together, it can be kind of slick, it doesn't offer as much grip as I thought it would, it can show dirt really easy, just jumping in and out of the boat taking my shoes off it can show dirt on the grey. So I am kicking around my next move. If anyone has dealt with the adhesive that holds it to the floor I am all ears, would love to hear how that went. For the next go around, I do like the spongy feel under my feet so I have been thinking of doing something more like the molded stuff that has more of a grippy shape, like the jet ski hydroturf or whatever that stuff is called. I really dig the look of the faux teak in the grey and black...thought it looked way cool but I have slipped on my ass from it and the delam issue sucks. I think I could fix the delam issue by going with a different brand but I feel like it might still be slick. We never wear shoes on our boat and I have seen others slip...I may be the only one who hit the deck, at least it was soft I guess. I don't really want to go back to carpet and I don't really love the fuzzy look of the miners moss (No offense to those who have it, I'm not trying to be that guy) Thoughts???? -
Dripless Shaft Seal Upgrade on 2007 LSV
rhino89523 commented on Rugger's project in Engine, Transmission & Performance Projects
My project started from the needing the shaft bearing side and deciding to do the seal at the same time. I'm a full summer in now and have not even had to think about that seal. Your write up and pictures are killer and will be helpful I'm sure. For me the bearing went really easy, I used a really long sawzall blade and just kept it flat...didn't cut into the strut at all. Tapped the rubber/bronze deal out...had the glides in the freezer and just tapped those in, think I had to use a piece of wood on the top side to slam it in. -
Thats kind of a good call, I end up all twisted laying in my locker almost dislocating my shoulder to grease that sucker up and there is plenty of room to remote zerk that thing...adding remote zerk to my little list.
-
When I did my Glide bearings I had to pull the rudder to clear the shaft, I did a very similar ghetto floor jack lift procedure to get it out. I should have done this while it was out but didn't. Now I think this is on my list just because. $50 for the re seal kit seems steep for what is provided, they are proud of those parts. Nice write up, great job. You say you are not an expert but in one of the photos it is clear that you are wearing latex gloves...It just doesn't get more pro than that Doctor Rugger...haha.
-
Closed cooling on 8.1 in wakesetter 247
rhino89523 commented on 2008_247lsv's project in Engine, Transmission & Performance Projects
I would love to have closed cooling. I run in Pyramid that is Briny so I wouldn't be running salt through my motor. Like you said car motors like antifreeze. In my dirtbikes I usually run distilled water but you always add water wetter to lube up all the seals and keep the water pump alive, our boats are not getting any love in the lube department. The 5 minute winterization would be sweet as well just pop a plug or 2 and dump the manifolds, I keep my boat in my back garage/man cave so it's not too bad of a deal because I don't really have to worry too much about it freezing but I would love to know I have coolant flowing around in my motor instead of salty water or dirty abrasive water. I winterized on my way back from Powell once because I couldn't drive anymore (too tired) and it was supposed to Freeze that night....anything to make that process go a little quicker and be more sure I'm not going to crack anything I am into. -
False Wall for Aftermarket Subwoofer Box
rhino89523 commented on bsharer's project in Sound System Projects
I'm joking, project people are always their own worst critics. I look at it and think "man that looks sweet!!!!!!" you see every flaw and pitfall you fell into along the way. It's like the curse of doing everything yourself. It looks really great and has given me some Ideas for something I might want to do in the future. I appreciate the offer....pretty darn cool of you. -
False Wall for Aftermarket Subwoofer Box
rhino89523 commented on bsharer's project in Sound System Projects
It seems like you have a few things you would like a second chance at and being the team player kind of guy that I am I would like to offer up my boat as a chance for you to really get this design down to a perfection status. -
False Wall for Aftermarket Subwoofer Box
rhino89523 commented on bsharer's project in Sound System Projects
Looks like all goals were accomplished....way cool looks great!!!! -
Your wiring is really clean, a dream for a guy who buys things used...I never see anything that nice, I get scotch locked source power and just have to re do everything.
-
Kojak's Tribal Delete & Graphics Install
rhino89523 commented on Kojak's project in Miscellaneous Projects
I don't know man, the Tribal would have looked killer with my tribal band tattoo....kidding of course, I don't even have tattoo's. It looks really nice, Domed Numbers really did knock it out of the park and you nailed it on the install....looks perfect. My boat is all naked on the side, it had some tribal stuff and I like it plain...at least I did. Looking at your boat naked I think it looks better with a graphic and the ones you chose really set it off!!! That's it, my nickname has always been Rhino, my last name is Ryan, I'm a big guy, I played football as a lineman, and picked up the nickname in High School...Dropped it when I went to college, I mean I'm not going to introduce myself as a pachaderm...ever!!! and it still came back to me, so I'm stuck with it, could be worse I guess. Anyway now I think I need to get a huge Tribal Rhino tattoo that covers my whole back, then I will get the same tribal rhino on the side of my boat fading into tribal flames and barb wire!!!! Wake garage inspires again -
Bullards bar is awesome, anyone been there yet? Any water down that way warmed up nice yet?
-
Nice garage, I built a 1200sqft in my backyard and wish I went at least double that size.
-
Hell Yeah @dukesofhazzard daughter is ripping!!!!!
-
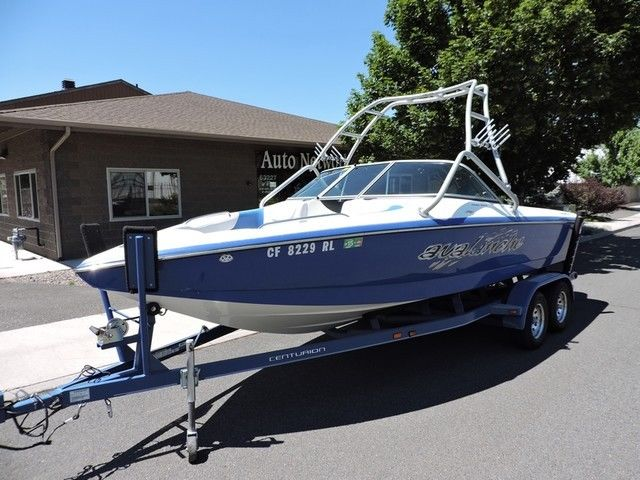
Mine had a big Avalanche thing on there kind of tribal like...with scratches through it and pretty deep into the Gel coat...all part of price negotiations. I thought I could live with the scratches, and I could have. I bought the boat in Oregon and live in Nevada so had time to think on the drive home. Bought some rubbing compound on the drive and spot checked it. That night I used the heat gun to pull the stickers and wet sanded the whole side, then started polishing. When the wife came out to see our "new" boat for the first time I had the whole side all white looking from wet sanding and I thought she was going to lose it. The picture I posted was the next morning. It came out really good and I actually prefer it without the stickers. This is actually how the boat looked when I bought it.
-
So I am posting this with no pictures. The reason for this is 2 fold. First I suck with a camera and I am a big guy replacing the cable in a small space. the work was tough enough so getting pictures wasn't going to happen. Additionally at the time I wasn't on this website...Admin no I am not looking for a hat or whatever just thought maybe this could help. O.K. so this is a little off memory but I'll hit a few of the key points for this one. First off don't be afraid it wasn't nearly as hard as I had heard it would be. Second if your steering isn't a one finger affair you probably need this cable. My boat turned like I was driving one of my old 60's internationals without power steering and now it turns really easy. The first thing I would do it find the cable number, it is on the cable sheathing in white letters. As I remember there are only like 3 different ones they usually use in the V-drives. Look for this number...if you can find it great...order the new cable. In my case the Teleflex number had come off so I had to do it by length...not a big deal. If you need to remove the cable to get a length hook your fish, a piece of rope, whatever you are going to use to your old cable and pull that through with your cable. If mine had the number on it I think I would have removed it from the helm, removed it from the rudder, cut the big helm rack and pinion piece off and pulled the new one through using the old cable. In my case I pulled from the helm up and had the rope connected. On the avalanche you can remove the floor so it really isn't a big deal but on boats without the removable floor make sure you pull a fish with you when you remove the old cable or use the cable as the fish....O.K. enough about the fish. If you have your cable great, if you don't lay it on the floor and get a measurement, they are in feet and the footage is part of the teleflex part number get the cable. You have to pull from the rudder side as that is the small end of the cable, attach your new cable with the rudder side to your fish. attach it well, if you lose it, it is going to suck. Now pull your cable through. If you can get help it helps to feed it from one end and pull from the other. This isn't like pulling electrical into your house, if you catch on something you are caught...back up and go again, don't pull hard it should just slip into position. Now attach everything and you are done. As I remember there is one big bolt you have to deal with that is like an 1"1/8" wrench required...something like that. As I remember there is a step you can skip here to make it easier but you will see what I mean if you got this far. The cable does need to be fed through this rear mount point before attaching to the rudder. Congrats now your boat will turn super easy. I was told this project was a royal pain by everyone I talked to. It took me 10 minutes to get it out, 2 minutes to measure, 2 days to get the cable, and about a half hour to put it in.
-
Man I just did this last year, think I either added it as a project or tacked onto the completed original project which was the reason I went with the glide. My install was a pain because the motor was way out of alignment....probably half the reason the cutlass went bad. I am happy with the parts that were provided and the Glide folks were awesome. If I enter and win can I donate it to my favorite entrant??? 2005 Avalanche, projects so far since this picture was taken. Glide bearings and seals Flooring home made wake gate Ballast work figuring out how to properly service everything cut me some slack I've only owned it a full season...I'll get some more stuff going. Projects before this picture was taken were a steering cable and pulled the stickers and buffed out the deep scratches.


